How To Knit 2×2 Rib Stitch
If you’ve ever admired the cozy cuffs of a sweater, the snug band of a beanie, or the stretchy hem of a scarf, chances are you’ve encountered the 2×2 rib stitch. This classic pattern is a cornerstone of knitting, blending style and functionality effortlessly. Let’s learn how to knit 2×2 rib stitch.
With its alternating columns of knit and purl stitches, the 2×2 rib stitch creates a fabric that’s both stretchy and structured, making it perfect for edges that need to hug without sagging. But beyond its practicality, this stitch offers a timeless aesthetic that can elevate any project.
In this article, we’ll walk through how to knit it step-by-step, explore its many uses, and share tips for mastering this versatile pattern. By the end, you’ll see why this humble stitch is anything but ordinary!
Not only does the 2×2 rib stitch add texture and structure to your knitting, but it’s also beginner-friendly. Once you get the hang of switching between knit and purl stitches, you’ll find it to be a rhythmic and satisfying pattern to work on.

Looking to add a stretchy, textured edge to your next knitting project? This guide will show you step-by-step how to knit the 2×2 rib stitch, troubleshoot common mistakes, and use it creatively in your designs. Let’s dive into this essential stitch pattern!
Another option for cuffs, collars, and edges for projects is 1×1 ribbing. Give that stitch a try as well!
Disclosure: Some of the links below are affiliate links. This means that, at zero cost to you, I will earn an affiliate commission if you click through the link and finalize a purchase.
2×2 Rib Stitch
The 2×2 rib stitch is a stitch that every knitter should learn as it is a common stitch pattern for garments. As you can see in the video, 2×2 rib stitch creates a stretchy fabric that with vertical ridges that is the same on both sides of the fabric.
When knitting this stitch, remember to knit your knits and purl your purls. All your knit stitches will create a line of v’s on your work and the purls will create a line of bumps. This is what creates the ribbing effect. If you see a V, you knit that stitch. If you see a bump, you will purl.
Ideal for edges and trims, the 2×2 rib stitch is commonly used in projects like hats, cuffs, collars, and hems.
This 2×2 rib stitch swatch was knit using Bernat Super Value in the colourway Grey Ragg on size 6* Addi click knitting needles. I cast on 26 stitches using the long tail cast on.
*I am a loose knitter so I size down. The recommended knitting needles for this yarn is 5.0mm US Size 8.
Follow these steps to create this timeless stitch pattern:
How to Knit 2×2 Rib Stitch Flat
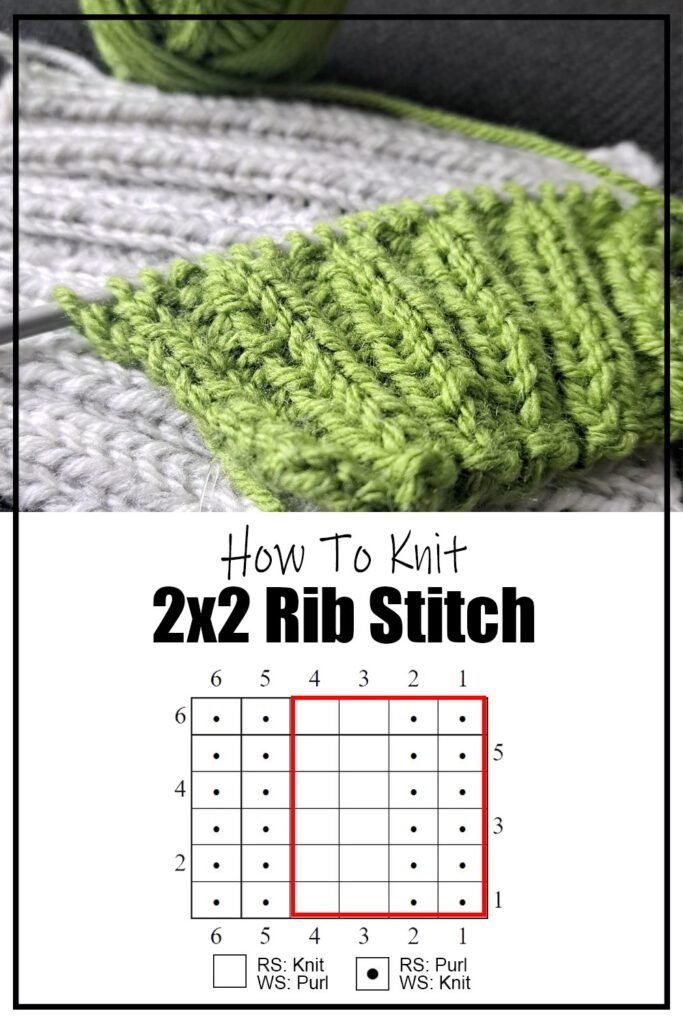
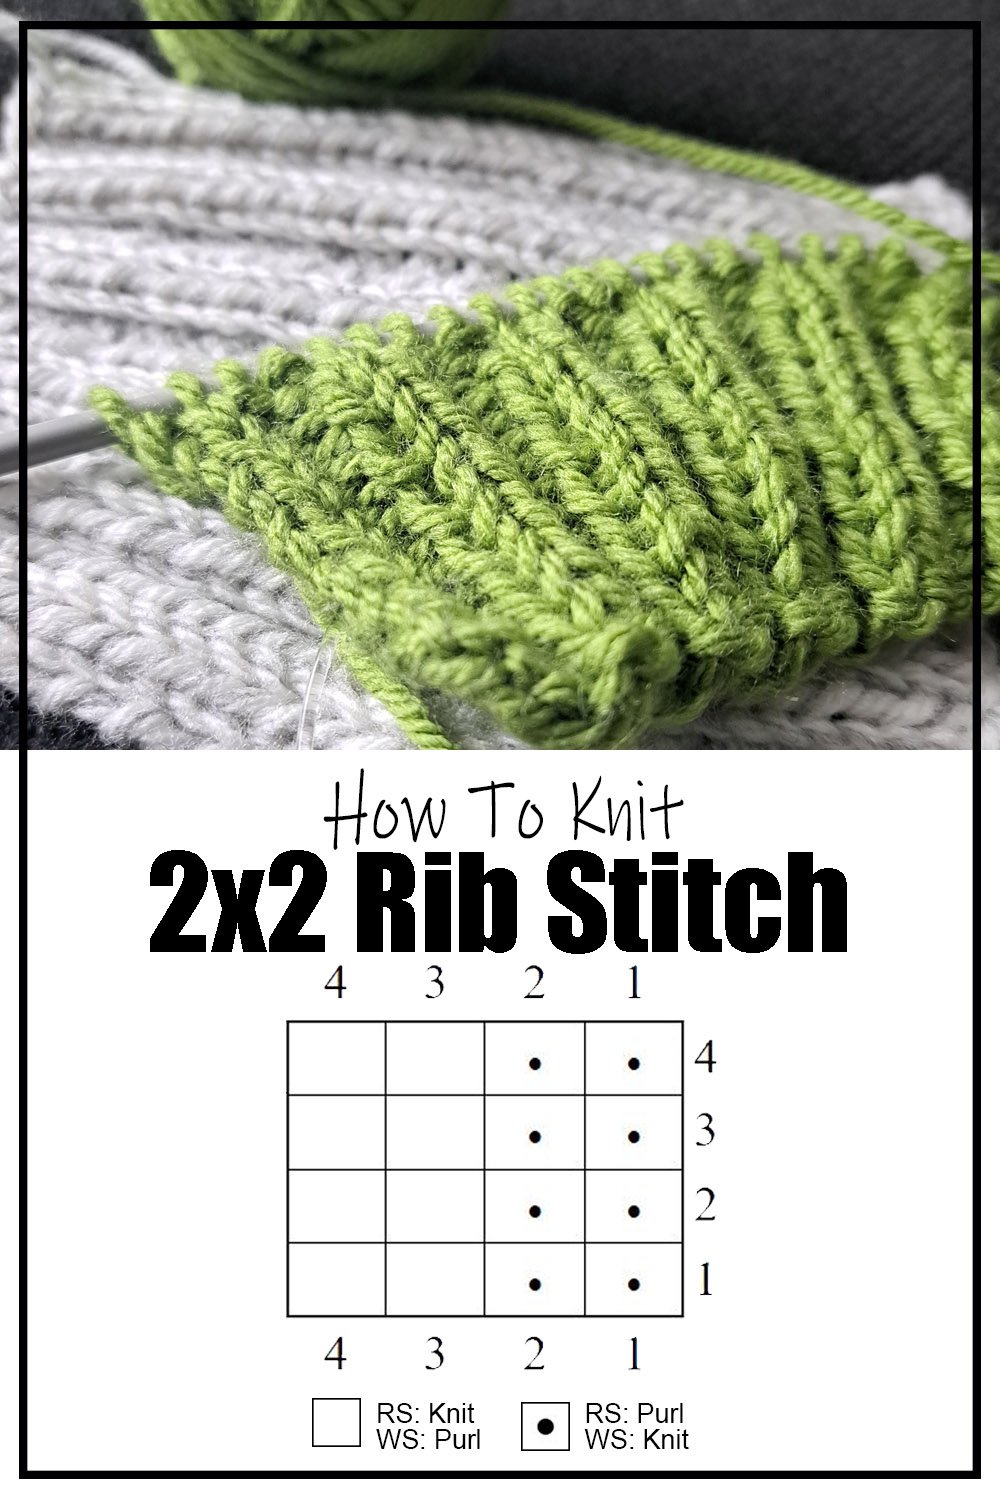
2×2 Rib stitch is achieved by alternating between knitting and purling – k2, p2. This created a stretchy fabric with ribs running vertically on the fabric. When knitting this stitch, remember to knit your knits and purl your purls.
Step 1: Cast On
Cast on your desired number of stitches. I recommend casting on a multiple of 4 + 2. This will create fabric with knit stitches at the beginning and end of your row. Use a stretchy cast-on method like the long-tail cast-on for an even cast on edge.
example: 26 total stitches is 24 (a multiple of 4) plus 2 edge stitch.
Step 2: Knit Two, Purl Two
The main repeat of 2×2 rib is knit 2 stiches, purl 2 stitches. At the end of the row you will have two extra stitch – knit these stitches. Turn your work and repeat.
row 1: *k2, p2*, repeat until 2 stitches remain, k2
Step 3: Purl Two, Knit Two
On the wrong side of your work, the pattern will be opposite. Your repeat is *purl two, knit two*. Your last two stitches will be purls.
row 2: *p2, k2*, repeat until 2 stitches remain, p2
Step 3: Repeat
Continue alternating between knit one and purl one the next until your project reaches the desired length.
**If you chose to cast on a multiple of 2 without the edge stitches, you will always start with a knit stitch. Row 1 will be *knit two, purl two* and row 2 will be *knit two, purl two*. Remember you will knit your knit stitches from the previous row, and purl the purl stitches from the previous row. This will result in one edge of your fabric being purl stitches and the other edge being knit stitches.

How to Knit 2×2 Rib Stitch In The Round
Knitting 2×2 rib stitch in the round is just as easy as working it flat!
Step 1: Cast On
Start by casting on the desired number of stitches, in a multiple of 4, for your project. For beginners, the long-tail cast-on method is a great choice as it creates a neat, stretchy edge. Place a stitch market to indicate your beginning of round.
Step 2: Knit Two, Purl Two
2×2 rib stitch in the round is created by knitting two stitches and purling two stitches. Just keep knitting until you this pattern have reached your desired length.
round 1: *k2, p2*, repeat until end of round
Step 3: Bind Off
Once your project reaches the desired length, it’s time to bind off. To perform a basic bind off: knit the first stitch, knit the second, then pass the first stitch over the second and off the needle. Purl the next stitch and pass the first stitch over the second and off the needle. Continue in sequence. Knit the knit stitches and purl the purl stitches and repeat until only one stitch remains. Cut the yarn, leaving a small tail, and pull it through the final stitch to secure.

Troubleshooting Common Mistakes
The 2×2 rib stitch is a versatile and stretchy pattern, perfect for cuffs, hems, and cozy accessories. While it’s a straightforward stitch pattern, even seasoned knitters can run into issues. Here’s how to identify and fix common mistakes when knitting 2×2 rib:
Losing Track of the Pattern (Knit vs. Purl)
The Problem: It’s easy to forget whether you should knit or purl next, especially if you’re interrupted or distracted. This can result in mismatched stitches, ruining the clean ribbing look.
The Fix:
- Check Your Work: Look at your stitches—knit stitches form little “V” shapes, while purl stitches create horizontal bumps. Knit into the knit stitches and purl into the purl stitches to maintain the pattern. Learning to read your knitting is a very valuable skill.
- Use a Marker: Place a stitch marker after every rib repeat (e.g., every 4 stitches) to help you stay on track.
Uneven Tension
The Problem: Uneven tension can make your ribbing look sloppy, with some ribs tighter or looser than others.
The Fix:
- Relax Your Grip: If your tension is tight, consciously loosen your grip on the yarn.
- Check Needle Size: If the stitches look too loose, switch to a smaller needle size.
- Practice Consistency: Practice switching between knit and purl stitches smoothly, as tension can differ between the two.
Accidentally Adding or Dropping Stitches
The Problem: You might accidentally add a stitch by wrapping the yarn over the needle or drop a stitch, leaving a gap in your ribbing.
When I first learned how to switch between knit and purl stitches, I would frequently add stitches accidentally by doing a yarn over instead of just bringing my yarn forward. This is a very common mistake. While it can be frustrating, know that you are not alone.
The Fix:
- Count Your Stitches Regularly: Make it a habit to count stitches at the end of each row to ensure you haven’t added or lost any.
- Fix Dropped Stitches Immediately: Use a crochet hook or your needle to pick up the dropped stitch and place it back on the needle. Be sure to follow the correct pattern (knit or purl) when fixing it.
- Mark Pattern Changes: If your pattern transitions to another section, use markers or notes to avoid confusion.
- Bring yarn to the front or the back between needles: If your find yourself accidentally increasing stitches, remember to bring the yarn into position by going between the needles and not over the top of one (which would create a yarn over).
Twisted Stitches
The Problem: If you accidentally twist a stitch, the ribbing can look uneven or tight. Twisted stitches often occur when a stitch is picked up incorrectly or worked in the wrong direction.
Some patterns will have you intentionally twist stitches when doing ribbing, but standard 2×2 ribbing does not include twisted stitches.
The Fix:
- Watch Your Needle Placement: Ensure your needle enters the stitch correctly—from front to back for knits and back to front for purls.
- Correct Twists Quickly: If you notice a twisted stitch, drop it off the needle and reinsert it correctly before continuing.
Misaligned Ribbing on Circular Needles
The Problem: When knitting in the round, the ribbing may not align properly if the cast-on stitches twist or the pattern is miscounted.
The Fix:
- Avoid Twisting Cast-On Stitches: After casting on, lay all stitches flat on the needle before joining in the round. Check that the cast-on edge forms a neat circle with no twists.
- Place Markers: Use a stitch marker to denote the start of your round. Count carefully to ensure the pattern aligns when you reach the end of each round.
The Ribbing Isn’t Stretchy Enough
The Problem: Your ribbing may feel stiff or lack the desired elasticity.
The Fix:
- Choose the Right Yarn: Ribbing works best with elastic yarns like wool or blends with some stretch. Avoid stiff fibers for ribbed sections.
- Check Your Needles: Ensure you’re using the correct needle size; a slightly smaller needle can enhance the elasticity of your ribbing.

Pro Tips for Success with 2×2 Rib
Block Your Work: Ribbing often looks better after blocking. Gently stretch and shape your piece to even out the stitches and enhance elasticity.
Practice Switching Stitches: Switching smoothly between knits and purls is key to neat ribbing. Practice this transition to perfect your technique.
Use a Lifeline: Insert a lifeline (a piece of contrasting yarn threaded through your stitches) every few rows. If you make a big mistake, you can unravel back to the lifeline without losing your work.
Size Down Your Needles: Some patterns will tell you to size down your needles if switching between a body stitch pattern and ribbing for the cuff. This can make ribbing tighter which is important for things like a cuff or hem of a garment.


4 Comments
Comments are closed.